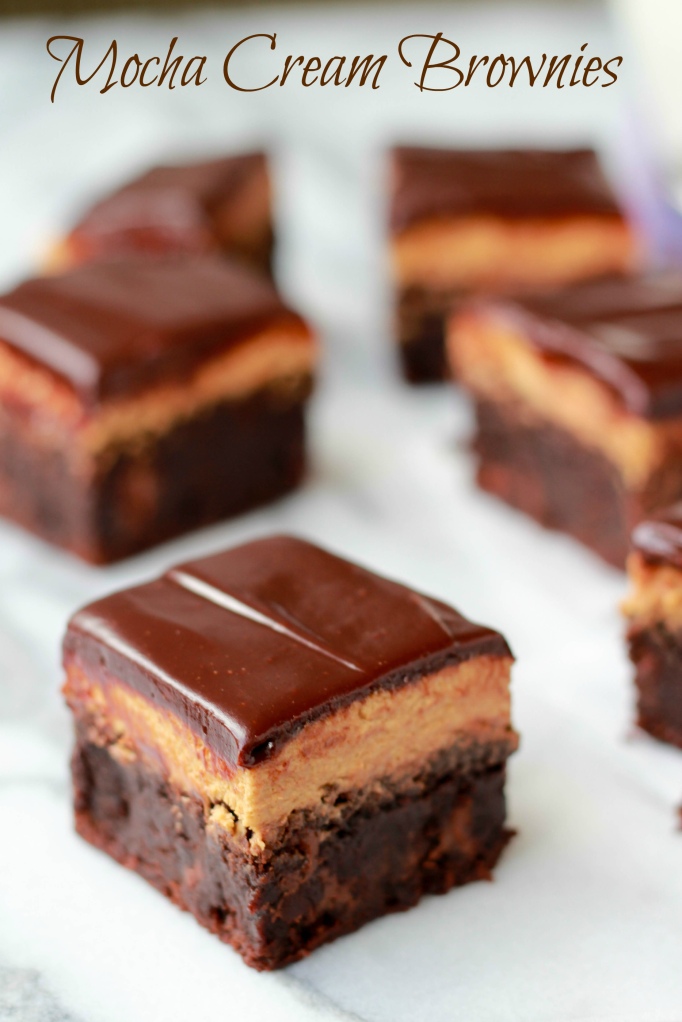
Mocha Cream Brownies

Mocha Cream Brownies -- Celebrating Sweets

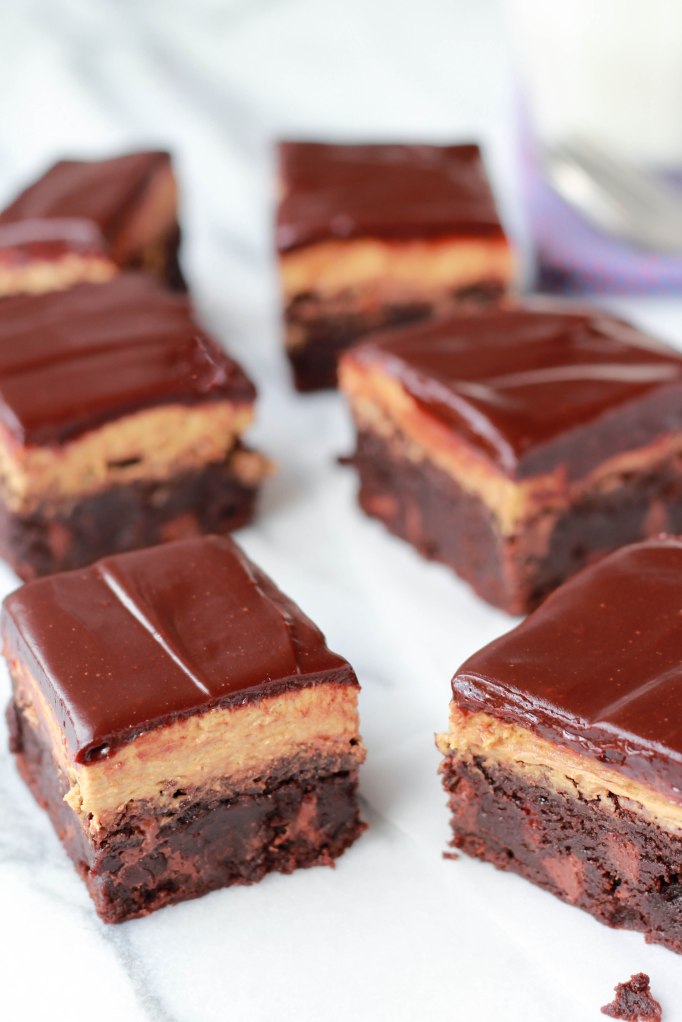
If you’re anything like me, you occasionally reach for a piece of chocolate as an afternoon pick me up. Well, I’ve found the perfect replacement for that afternoon snack: Fudgy brownies topped with a layer of espresso buttercream and finished off with a smooth chocolate ganache. Not only will these get you your afternoon chocolate fix, but an added punch from the espresso powder in the brownies and the frosting. In my book, chocolate + coffee is always a winning combination. These are so rich and decadent that a little piece will go a long way.
Although these brownies require three steps, they are very, very easy. The brownie batter is made in one bowl and the buttercream and ganache come together in a matter of minutes. Don’t be intimated by the list of ingredients or steps. Give these a try. You will not be disappointed!
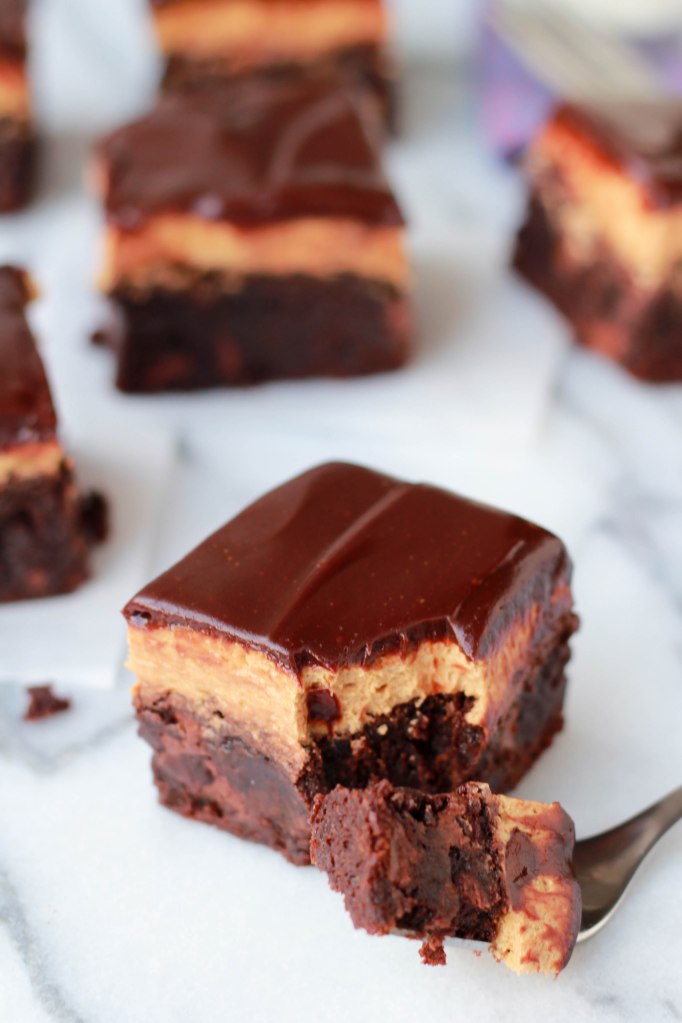
Mocha Cream Brownies from Celebrating Sweets

Mocha Cream Brownies - Celebrating Sweets

Mocha Cream Brownies
Makes one 8×8 or 9×9 pan

Brownies:
2/3 cup cocoa powder
1 1/2 cups granulated sugar
1/3 cup powdered sugar
3/4 teaspoon salt
1 cup all purpose flour
2 teaspoons espresso powder
1 cup semisweet chocolate chips
3 eggs
1/2 cup vegetable oil
2 tablespoons water or brewed coffee

Coffee buttercream:
1 3/4 cups powdered sugar
4 tablespoons butter, softened
2 tablespoons heavy cream or half and half
2 teaspoons espresso powder
1/2 teaspoon pure vanilla extract

Chocolate ganache:
1/3 cup heavy cream
1 cup semisweet chocolate chips

Begin by making the brownies:
Preheat oven to 350. Butter an 8×8 or 9×9 square pan. Alternately, you can line the pan with foil, leaving a couple inches of overhang on two sides (this will allow you to lift the whole tray of brownies out of the pan for easy removal). If using the foil, butter or spray it.

In a large bowl combine cocoa powder, sugars, salt, flour, espresso powder and chocolate chips. Whisk until combined. Add eggs, oil and water or coffee and stir until combined. Pour the batter into the prepared pan and smooth the top. Bake for 30-40 minutes (begin checking at 30 minutes). The brownies are done when a toothpick inserted into the center comes out without raw batter on it (there may be some fudgy crumbs on the toothpick – that’s ok). Be careful not to over bake. Remove from the oven and place on a cooling rack. Cool completely.

Once brownies are cool, prepare the buttercream frosting:
Beat powdered sugar and butter with a hand mixer or stand mixer until smooth. In a separate bowl stir together the cream, espresso powder and vanilla extract. Pour into the  butter/sugar mixture and beat on medium speed for several minutes, until smooth and creamy, scraping down the sides of the bowl as necessary. Using a butter knife or offset spatula, evenly spread the coffee buttercream over the top of the brownies. Place the brownies in the fridge while you prepare the ganache.

For the ganache:
In a small saucepan over medium-low heat, combine the cream and chocolate chips. Stir until melted and smooth. Remove from the heat and allow to cool slightly, for a couple of minutes. Pour the ganache over the buttercream topped brownies, smoothing the top. Return to the fridge for at least an hour for the ganache to firm up.

Brownies are best served at room temperature.

Brownies adapted from King Arthur Flour
Frosting and ganache adapted from Taste of Home
Cheddar-Chive Cornmeal Biscuits

cheddar chive biscuits
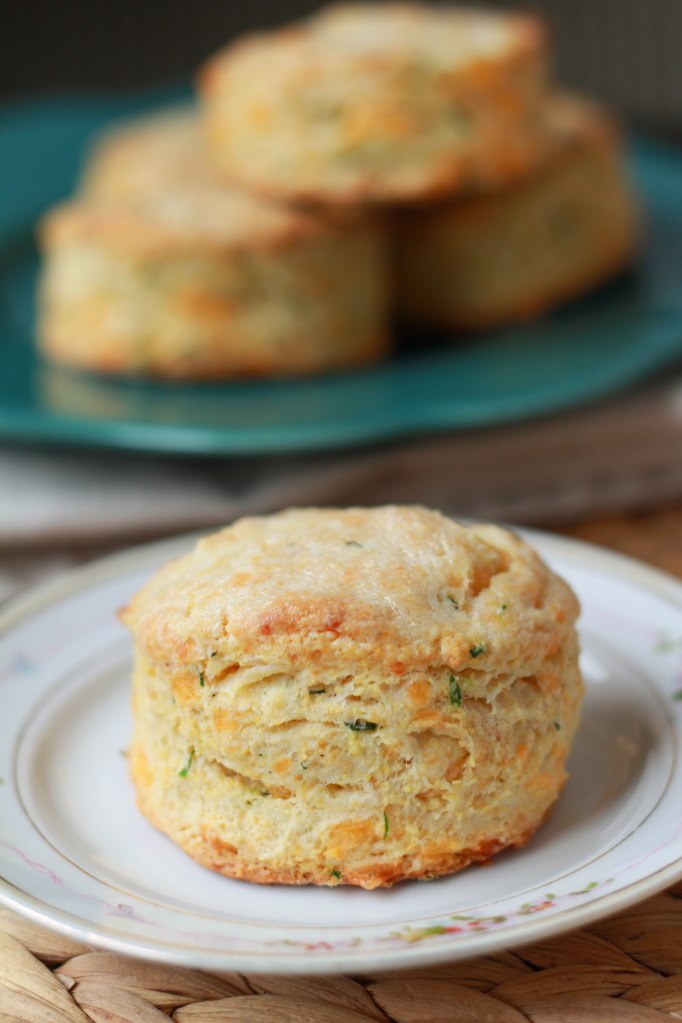
There’s something therapeutic about making homemade biscuits. Working the dough with your hands, patting it out and cutting it  – it’s like kitchen therapy. We’re battling colds in our house and although that usually means I don’t feel like cooking or baking, biscuits are the exception. And these biscuits are simply perfect. They are tender and buttery, with a slight crunch from the cornmeal and a light sharpness from the cheddar cheese and chives. These are great paired with tomato soup or alongside a salad, and I can only imagine how good they would be smothered in sausage gravy. These just beg to be eaten warm while the cheese is still slightly melted. I might have devoured one (or more) straight from the oven with a tiny smear of salted butter. Aahhh, heaven!
cheddar chive biscuits 2
Cheddar-Chive Cornmeal Biscuits
Makes 12 biscuits

1 1/2 cups all purpose flour
2/3 cup cornmeal
1 tablespoon baking powder
1/2 teaspoon baking soda
3/4 teaspoon salt
1 heaping cup shredded, sharp cheddar
4 tablespoons cold butter, cut into 1/2 inch cubes
3/4 cup sour cream (I used light sour cream)
3 tablespoons finely chopped fresh chives
3-5 tablespoons cream or half and half, plus additional for brushing on top

Preheat oven to 400. Combine flour, cornmeal, baking powder, baking soda and salt in a food processor fitted with a metal blade. Pulse several times to incorporate the ingredients. Add cheese and butter and pulse several more times, until the mixture looks pebbly with pea-sized lumps. Dump the mixture into a large bowl.

Add sour cream and chives to the mixture and stir it with a rubber spatula until just combined. Add 3 tablespoons of cream and stir until the dough just starts to come together. Add another tablespoon of cream if needed. Mix the dough with your hands to help it come together being careful not to overmix it.

On a lightly floured surface, lightly pat the dough into a 9×5 inch rectangle that is a little more than 1/2 an inch thick. Using a biscuit cutter or sharp knife, cut into 12 biscuits. Place the biscuits on a baking sheet and brush the tops lightly with some cream (this will help the tops brown). You can also sprinkle the tops with some salt and freshly ground pepper if you’d like.

Bake the biscuits for 12-15 minutes, until lightly browned on the tops and bottoms. Serve warm.

Loosely adapted from EatingWell

Chocolate Chip Cookie Pudding Parfaits

-chocolate chip cookie pudding parfaits
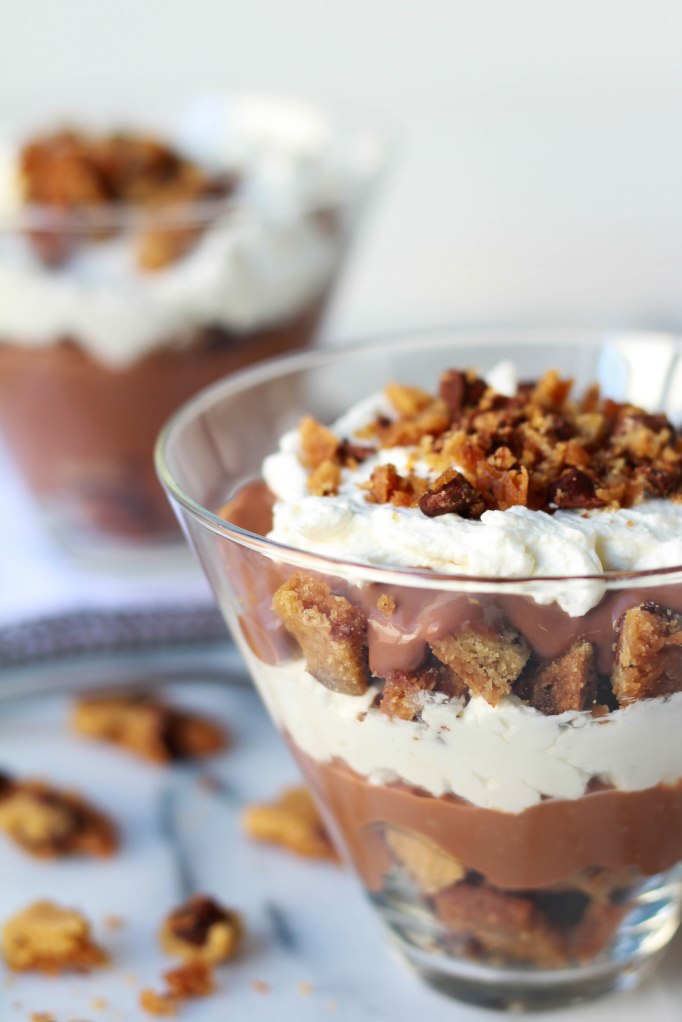
My husband recently returned from a business trip and I wanted to have something sweet waiting for him when he arrived home. He loves pudding and it had been a while since I made some, so I decided that was the way to go. Although he would have been perfectly happy with an ordinary bowl of pudding, I decided to take it a step further by making cookie pudding parfaits. Homemade chocolate pudding layered with crisp chocolate chip cookies and freshly whipped cream.

The nice thing about this recipe is that you can make the whole thing from scratch (pudding, cookies and whipped cream) or you can use store bought cookies and instant pudding for a shortcut. Either way, these are a fun and tasty dessert. Although I am usually a soft cookie fan, this is the time to use a crisp cookie. The cookie’s texture balances the smooth and creamy pudding perfectly. Simple and scrumptious!

Chocolate Chip Cookie Pudding Parfaits
Makes 4  parfaits

Pudding:
2 tablespoons cornstarch
1/4 cup granulated sugar
pinch of salt
1 1/2 cups whole milk
heaping 1/3 cup semisweet or bittersweet chocolate chips
1/2 teaspoon pure vanilla extract

Whipped cream:
2/3 cup heavy cream
2 tablespoons powdered sugar

For assembly:
8 medium/large crispy chocolate chip cookies, crumbled (store bought or homemade. I used this recipe)

Begin by making the pudding:
In a small saucepan, combine cornstarch, sugar and salt. Slowly whisk in the milk. Place the saucepan over medium heat and stir occasionally, alternating between a rubber spatula (to scrape the bottoms and sides) and a whisk (to prevent lumps). After about 10 minutes, the mixture will begin to thicken enough to coat the back of a spoon. At that point, add the chocolate and stir/whisk to combine. Stir for an additional 2 or 3 minutes, until the mixture thickens even more. Remove from heat and stir in vanilla extract.

Pour the pudding into a bowl and allow it to cool just slightly before covering the top with plastic wrap. Place the covered pudding in the fridge to chill and thicken, about 2 hours.

Once the pudding is chilled you can assemble the parfaits.

Assembly:
Using a hand mixer or stand mixer with the whisk attachment, beat the cream and powdered sugar for several minutes, until stiff peaks form.

In a glass or parfait dish, layer the crumbled cookies, chocolate pudding and whipped cream. Garnish the tops with additional cookie crumbs.

Pudding adapted from Smitten Kitchen

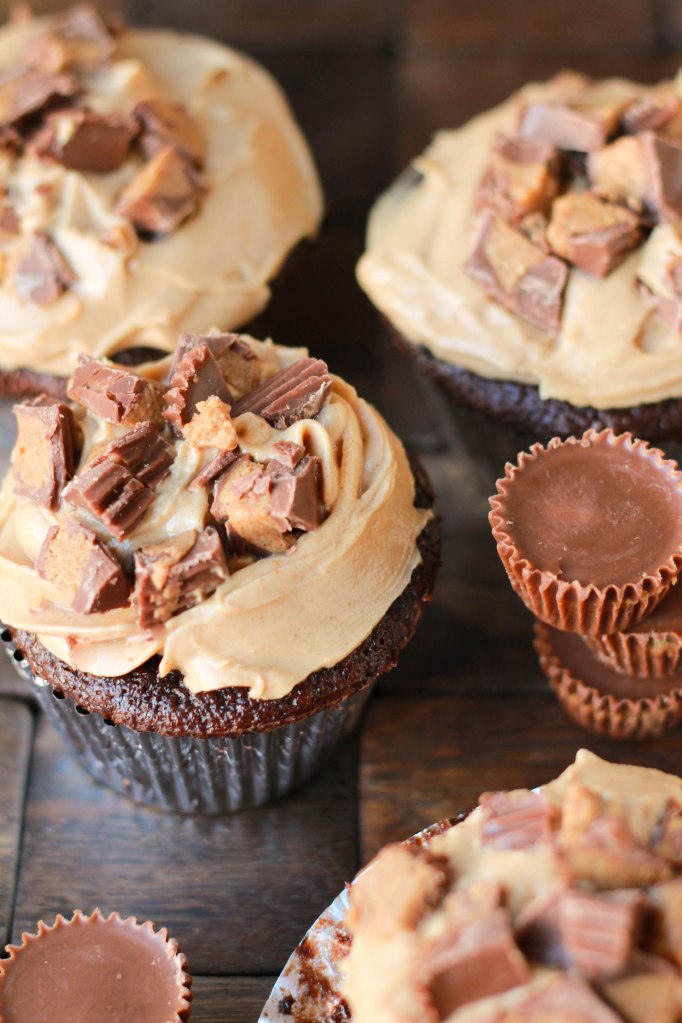
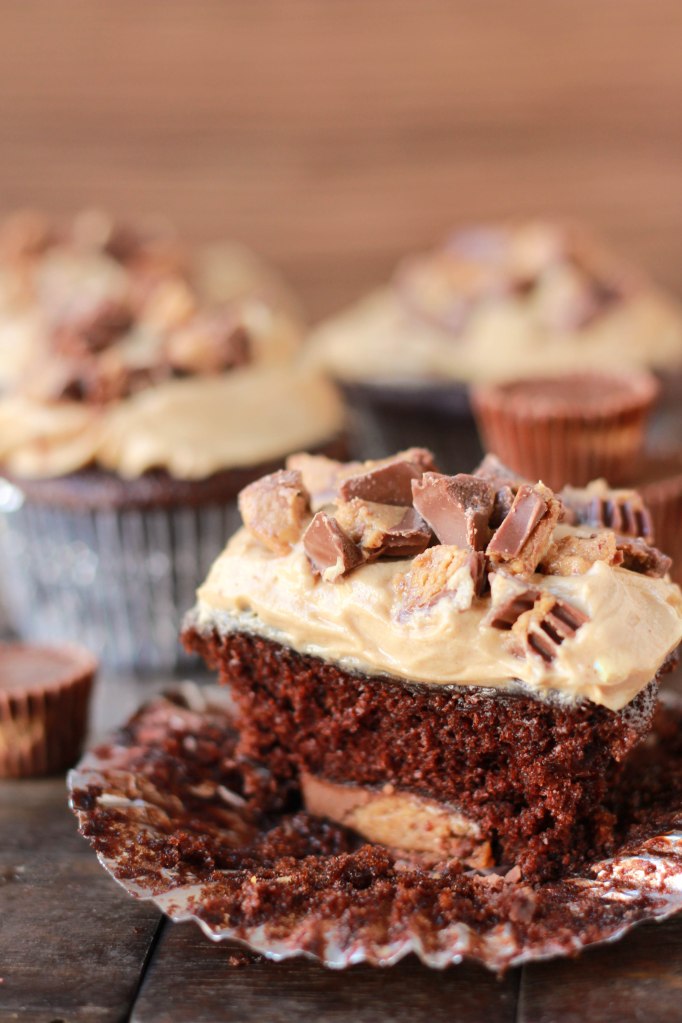
Peanut Butter Cup Stuffed Chocolate Peanut Butter Cupcakes

chocolate pb cupcakes 3
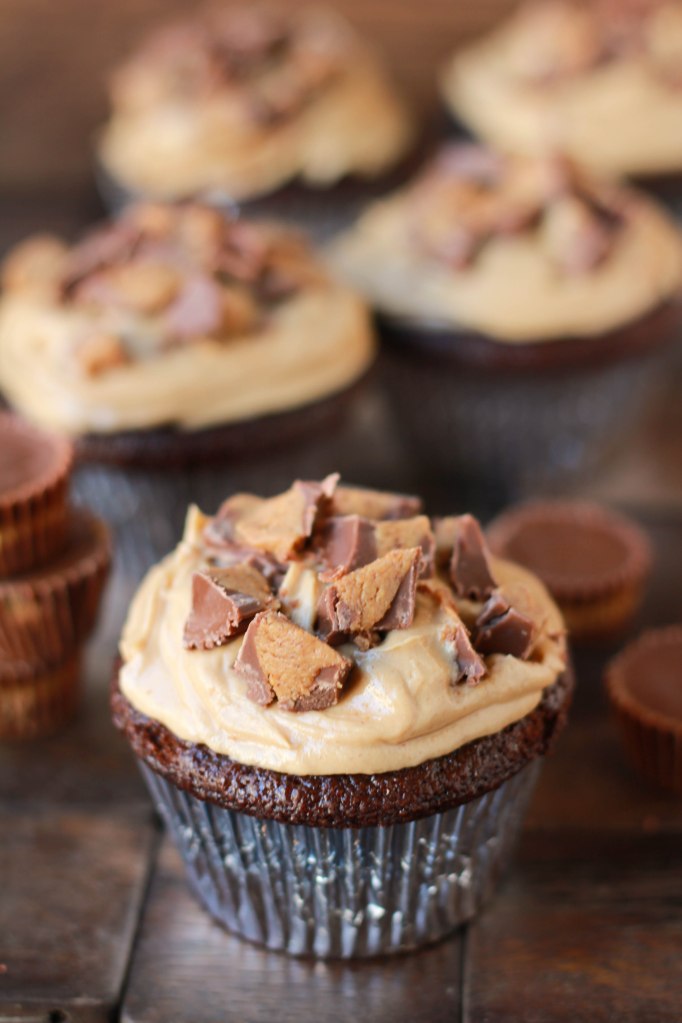
Chocolate and peanut butter have to be one of the all-time best combinations. As much I as I love each on their own, they are so delicious when paired. These light chocolate cupcakes are filled with peanut butter cups, topped with a luscious peanut butter frosting and garnished with more peanut butter cups. It’s chocolate peanut butter heaven! The cupcake and frosting recipes are both super simple. And if you’d like to make these for a party, the cupcakes stay so moist that you can even make them the day before (wait until the day of to frost them, though). Since these cupcakes get topped with chopped peanut butter cups, I don’t take the time to frost them with a fancy tip and pastry bag. I just use a butter knife to pile on as much frosting as I can and then sprinkle on lots of peanut butter cups. Grab a glass of milk and enjoy!
chocolate pb cupcakes

chocolate pb cupcakes 2

Peanut Butter Cup Stuffed Chocolate Peanut Butter Cupcakes
Makes approximately 15 cupcakes

Chocolate Cupcakes:
1 cup granulated sugar
3/4 cup plus 2 tablespoons all purpose flour
1/4 cup plus 2 tablespoons unsweetened cocoa powder
1 teaspoon baking powder
1/2 teaspoon baking soda
pinch of salt
1 egg
1/2 cup milk
1/4 cup vegetable or canola oil
1 teaspoon pure vanilla extract
1/2 cup boiling water
about 30 miniature peanut butter cups, 15 left whole (for filling the cupcakes) and the other 15 coarsely chopped (for topping the cupcakes)

Peanut Butter Frosting:
1 cup powdered sugar
1 cup creamy peanut butter
5 tablespoons butter, softened
3/4 teaspoon pure vanilla extract
1/4 teaspoon salt
1/4 to 1/3 cup cream or half and half

For the cupcakes:
Preheat oven to 350.

Combine first 6 ingredients in a bowl. Once combined, beat in egg, milk, oil and vanilla. Beat for 2 minutes. Stir in boiling water – the batter will be thin. Pour the batter into a  muffin tin that has been sprayed or filled with paper liners, filling each about 2/3 full. Place one peanut butter cup in the middle of each of the cups of batter – no need to press it down – it will sink as the cupcakes bake.

Bake the cupcakes for about 18 minutes, until the they have puffed up slightly and the tops spring back when you touch them.

Cool for 10 minutes in the pan and then remove to a wire rack to cool completely.

For the frosting:
Beat the powdered sugar, peanut butter, butter, vanilla and salt for several minutes, until smooth. Slowly add in cream or half and half until you reach your desired consistency.

Using a butter knife, generously frost the tops of all the cupcakes and sprinkle with chopped peanut butter cups.

Cake adapted from Hershey’s
Frosting from Ina Garten

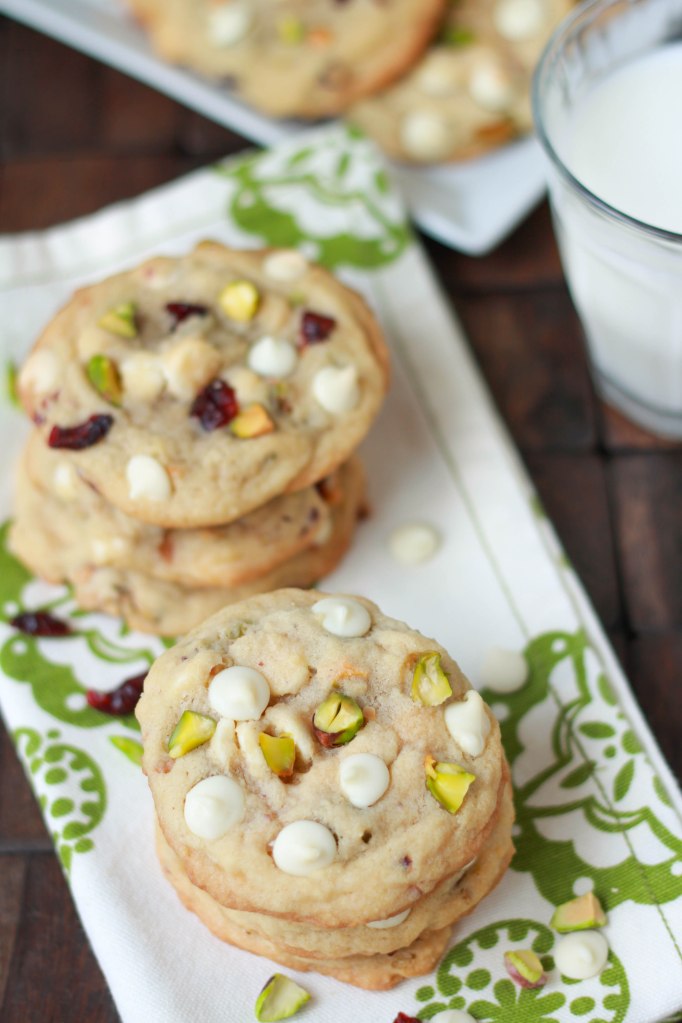
Soft White Chocolate Pistachio Cookies

white choc pistachio cookies final
Clearly I have a thing for soft cookies – I can’t help it, I love them! So, to add another to my growing list of soft cookies, I made soft white chocolate pistachio cookies. I’m not usually a big fan of white chocolate chips – they tend to be too sweet for my taste – but in this recipe they are paired with salted pistachios, which adds the perfect salty, crunchy balance. I threw a handful of dried cranberries into half of the cookie batter and I’m not sure if I like them better with or without. Try for yourself and see what you prefer. I’ll repeat what I always say when it comes to soft cookies: Do not over bake these. They will look slightly underdone when you remove them from the oven, but they will continue to cook as they cool. If you’d like a crisper cookie, just add a minute or two to the baking time.

Soft White Chocolate Pistachio Cookies
Makes 16 medium sized cookies

1 1/2 cups all purpose flour
1/2 teaspoon baking soda
1/4 teaspoon salt
1 stick butter, softened
1/2 cup granulated sugar
1/3 cup light brown sugar
1 egg
1 teaspoon pure vanilla extract
1/2 teaspoon almond extract
1/2 cup  salted pistachios, coarsely chopped
1/2 cup white chocolate chips
1/2 cup dried cranberries (optional) use half this amount if you’re adding the cranberries to half the batter

Preheat oven to 350. Line two baking sheets with silicone mats or parchment paper.

In a bowl, whisk together flour, baking soda and salt. Set aside.

In a separate bowl, beat butter and both sugars for several minutes, until light and fluffy. Add egg, vanilla and almond extracts, mixing until combined. On low speed, add in flour mixture and mix until just combined.

Stir in pistachios, white chocolate chips and dried cranberries (if using). I usually reserve a tablespoon or two of chocolate chips and nuts to press onto the tops of the cookies before baking.

Scoop a heaping tablespoon of dough and roll into a ball, or use a 1 1/2 tablespoon scoop, and drop dough onto prepared baking sheets leaving about an inch for spreading. Using the remaining nuts and chocolate chips, press several of each onto the top of each mound of dough.

Bake for 8-10 minutes, until the center of the cookies are just barely set. The cookies should look soft and slightly under cooked. They will finish cooking while cooling on the baking sheet.

Remove from oven and let cookies cool on baking sheet for 10 minutes, then transfer to a wire rack to cool completely. If you want your cookies to have crispier edges, you can cool them completely on the baking sheet.

See also:

Soft Sprinkle Sugar Cookies
cookie 3

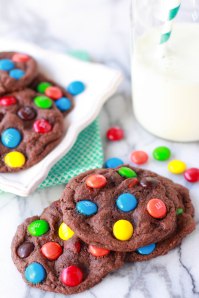
Soft and Chewy M & M Cookies
m&m cookie 3

Soft and Chewy Chocolate M & M Cookies
choc m&m cookies

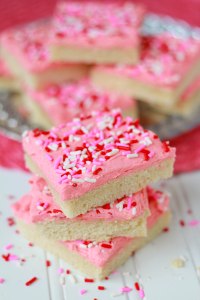
Soft Sugar Cookie Bars
sugar cookie bars

Apple, Oat & Almond Breakfast Crisp

apple breakfast crisp
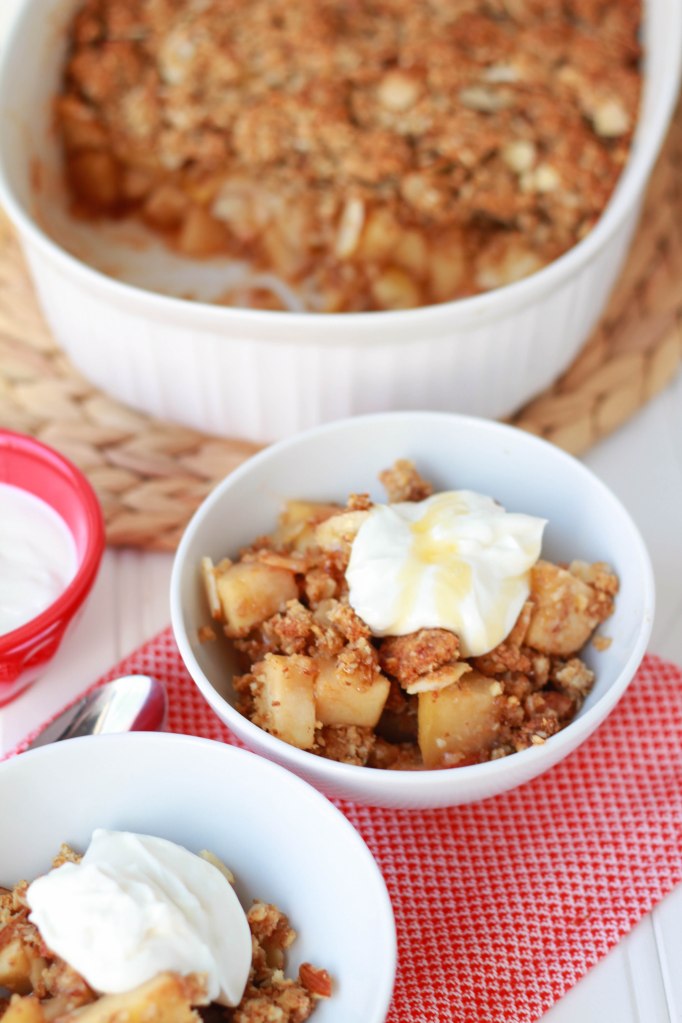
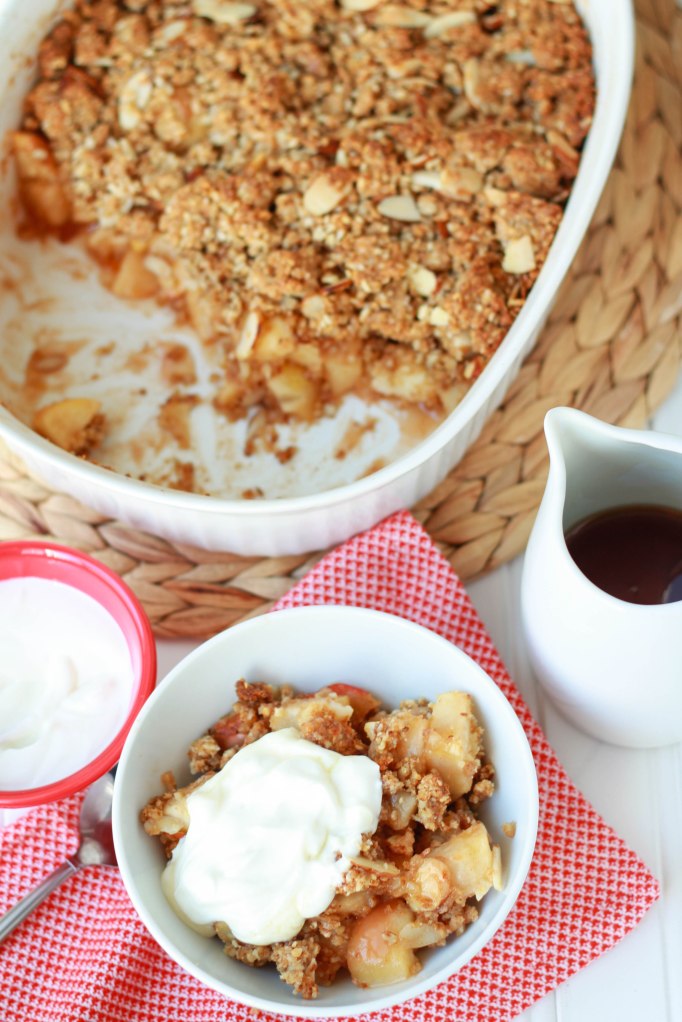
I know what you’re thinking … a fruit crisp, for breakfast? Yes, my friends, and I can’t believe I hadn’t done this sooner. Now, there are several things that make this fruit crisp fall into the “breakfast” category instead of “dessert.” The topping is made from whole grains (both whole wheat flour and oats), the sugar is reduced in both the topping and the filling, and instead of serving this with ice cream, as you would for dessert, I served it with a dollop of  yogurt and a drizzle of maple syrup. The combination of soft, cinnamon-spiced apples along with the nutty, crunchy topping  is divine. I love the contrast of the warm fruit with cool yogurt. So good!

For me, this fruit crisp is the perfect breakfast. It feels healthy and slightly indulgent at the same time. If you’re in a breakfast rut, you must give this a try. I made this as our Sunday morning breakfast and the leftovers kept well in the fridge. It was fantastic to scoop and heat a serving at a time throughout the week as we wanted it (you can eat it cold too – straight from the fridge). I will definitely be making this again, and as the seasons change, I look forward to adapting it with different berries or stone fruits. Check back for those. 🙂

apple breakfast crisp 1

Apple, Oat & Almond Breakfast Crisp
Makes 8 servings

Topping:
1 1/2 cups sliced raw almonds, divided
1/2 cup white whole wheat flour or whole wheat pastry flour
1/2 cup rolled oats
1 teaspoon baking powder
3 tablespoons brown sugar
1/4 teaspoon salt
1 teaspoon ground cinnamon
1/4 teaspoon ground nutmeg
6 tablespoons cold unsalted butter, cut into 1/2 inch pieces
2 tablespoons milk

Filling:
6 medium apples, peeled and cut into 1/2 inch chunks (about 7 cups ) – see note below
3 tablespoons  brown sugar, or more if you’re using tart apples
1 tablespoon lemon juice
1/2 teaspoon lemon zest
1 1/2 tablespoons cornstarch
1/2 teaspoon ground cinnamon

Optional toppings:
yogurt, for serving
pure maple syrup, for serving

Preheat oven to 375. Butter or spray the inside of a 2 or 2 1/2 quart baking dish. Set aside.

For the topping: Put 1 cup of almonds in a food processor, fitted with the metal blade. Pulse several times, until the almonds turn into a medium-fine almond meal. Add the flour, oats, baking powder, sugar, salt, cinnamon and nutmeg and pulse a few more times. Add in butter and pulse until the mixture resembles coarse meal. Add the milk and pulse several more times until combined. Dump the topping into a bowl and stir in the remaining 1/2 cup of almonds. Refrigerate the topping while you prepare the filling.

For the filling: Combine all ingredients in a medium sized bowl. Stir several times, until the sugar and cornstarch has been absorbed. Taste a piece of apple and determine if you’d like the filling a little sweeter. If so, add another a tablespoon or two of sugar and stir to combine. Pour the filling into the prepared baking dish.

Pour the topping evenly over the apples. I like to pinch some of the topping between my thumb and forefinger to help create some clumps in the topping. I think it adds a nice texture. Place the apple crisp in the oven and cook for about 30 minutes, until the topping is golden brown and the apples are soft. Allow to cool slightly and serve warm with a dollop of yogurt and a drizzle of maple syrup.

A note about the apples: Use whatever type of apples you prefer to bake with – a combination is good too. I only peeled half of my apples and left the other half unpeeled. The peel added nice texture and color and boosted the fiber and vitamins in this dish.

Topping adapted from Whole Grain Mornings

Almond Raspberry Layer Cake

almond raspberry cake 1
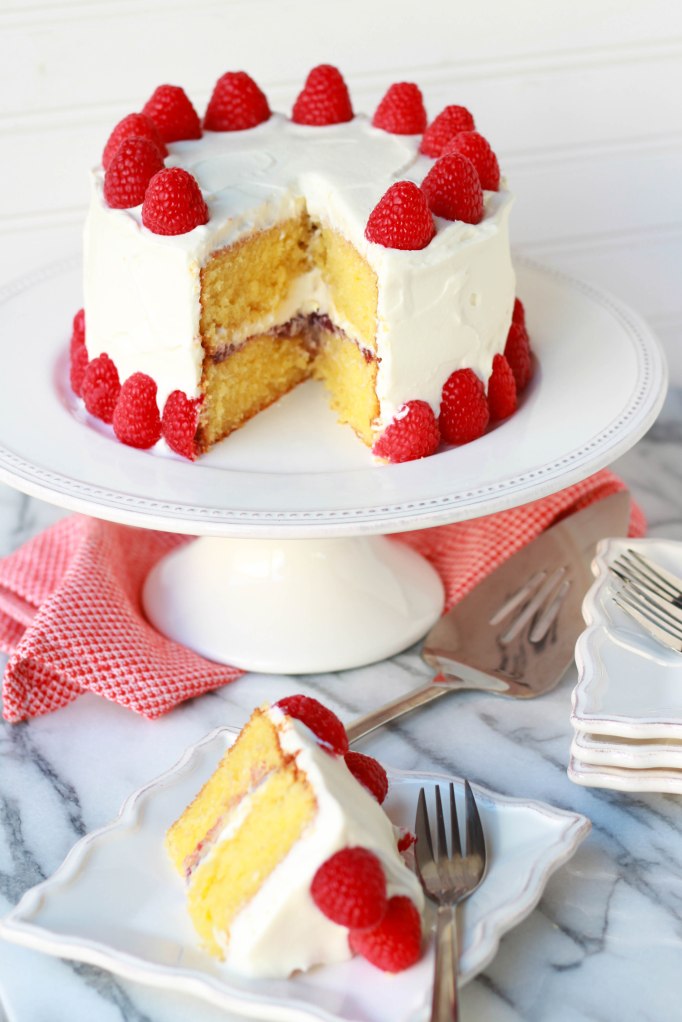
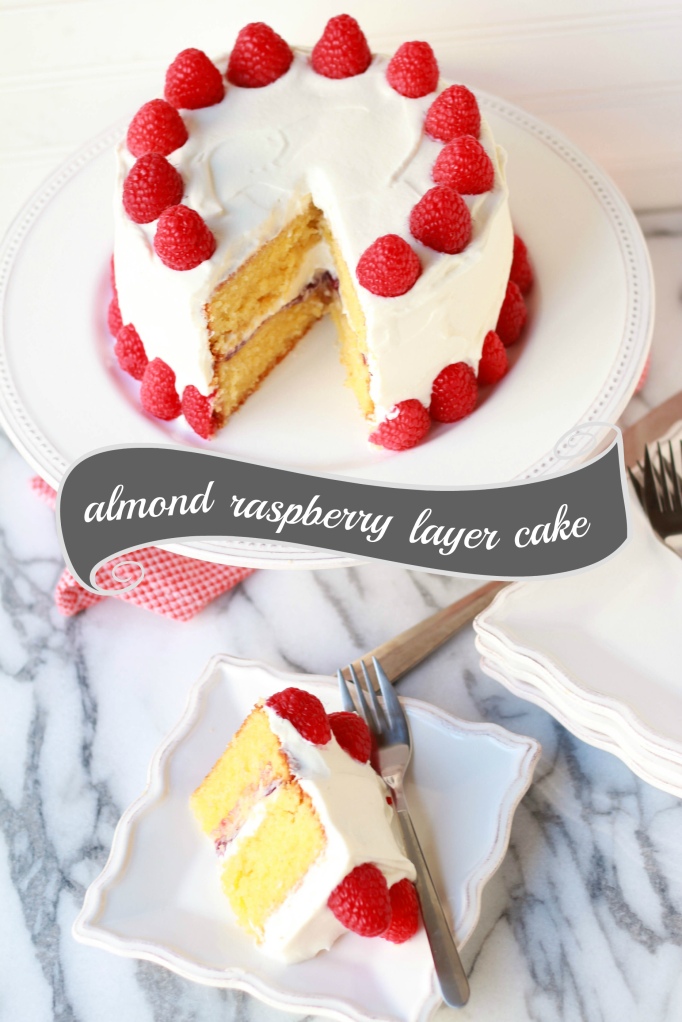
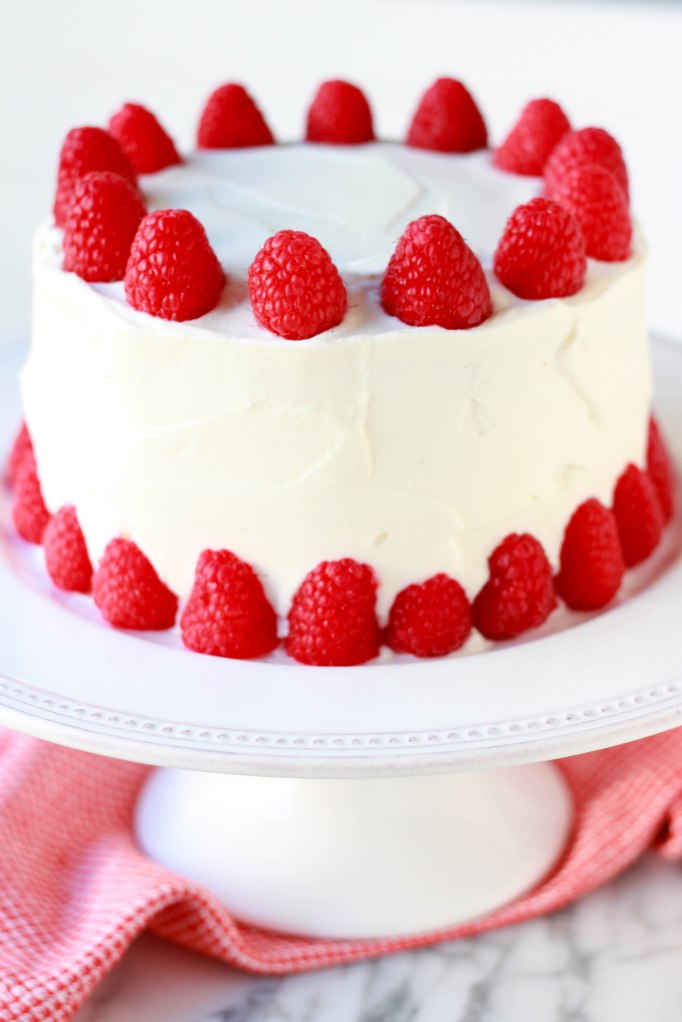
I recently celebrated my birthday and this almond raspberry layer cake was my birthday cake. The last several years, I’ve insisted on making my own cake. My sweet husband offers to bake me a cake every year, and I’m sure he’d do a great job (with a little micromanaging from you know who. Ahem). But honestly, I really love to bake and I only have the excuse to whip up a “fancy” layer cake a handful of times per year, so I am happy to do it myself. Here’s this year’s cake and possibly my new favorite. It’s a moist and dense almond cake that is layered with raspberry jam, topped with a whipped cream frosting and decorated with fresh raspberries. The cake offers bold almond flavor, the whipped cream frosting is sweet and rich and the fresh raspberries and raspberry jam offer the perfect fresh/tart compliment to the cake. I made this cake in two 6-inch pans, which I think are the perfect size when making a cake for a small gathering. If you don’t have 6-inch pans, you can easily double the recipe and bake it in three 9-inch pans.

almond raspberry cake
almond raspberry cake 2
Almond Raspberry Layer Cake
Makes a  two-layer, 6-inch cake
For a three-layer, 9-inch cake, double the cake and frosting recipe

For the cake:
7 ounces almond paste
2/3 cup granulated sugar
1 1/2 sticks butter (12 tablespoons), softened
3 eggs
3/4 cup all purpose flour
3/4 teaspoon baking powder
1/4 teaspoon salt

For the filling and frosting:
1/4 cup raspberry jam, microwaved for a few seconds to make it spreadable
4 ounces cream cheese, softened
1/3 cup powdered sugar
1/2 teaspoon pure vanilla extract
1/4 teaspoon almond extract
1 cup heavy cream
Raspberries, to garnish

For the cake:
Preheat oven to 350. Butter or spray your cake pans and line the bottoms with a circle of parchment.

Place the almond paste and sugar in a large bowl or in the bowl of a stand mixer. Beat the mixture for several minutes on low speed, until the almond paste is broken up into fine pieces, smaller than a pea. Add the butter and beat on medium speed for 3 or 4 minutes, scraping down the bowl as necessary. Add the eggs and beat until thoroughly combined. Add flour, baking powder and salt and beat on low speed until just blended.

Pour the batter into the prepared pans, smoothing out the tops.

Bake the 6-inch cakes for approximately 25 minutes (begin checking the 9-inch cakes after 25 minutes, they might need to bake a little longer). The cakes are done when they are golden brown and a toothpick inserted into the center comes out clean. Cover the tops loosely with foil near the end of the baking time if you feel that the cakes are looking too brown.

Cool cakes in the pan for 10 minutes, then invert onto a rack to cool completely.

For the frosting:
In  a large bowl with a hand mixer or in a stand mixer with the whisk attachment, beat cream cheese, sugar and extracts until thoroughly combined. Slowly add cream and then beat on high speed for 3-5 minutes, until the cream has thickened and the frosting is of spreadable consistency.

Assembly:
Spread the raspberry jam on top of one of the cake layers. Top jam with a layer of frosting, place the other cake on top of that (do this twice if you’re making a three layer cake). Frost the entire cake with an offset spatula or butter knife. Garnish the cake with fresh raspberries.

Store the cake in the fridge and remove to bring to room temperature before serving.

Cake recipe loosely adapted from Good Housekeeping

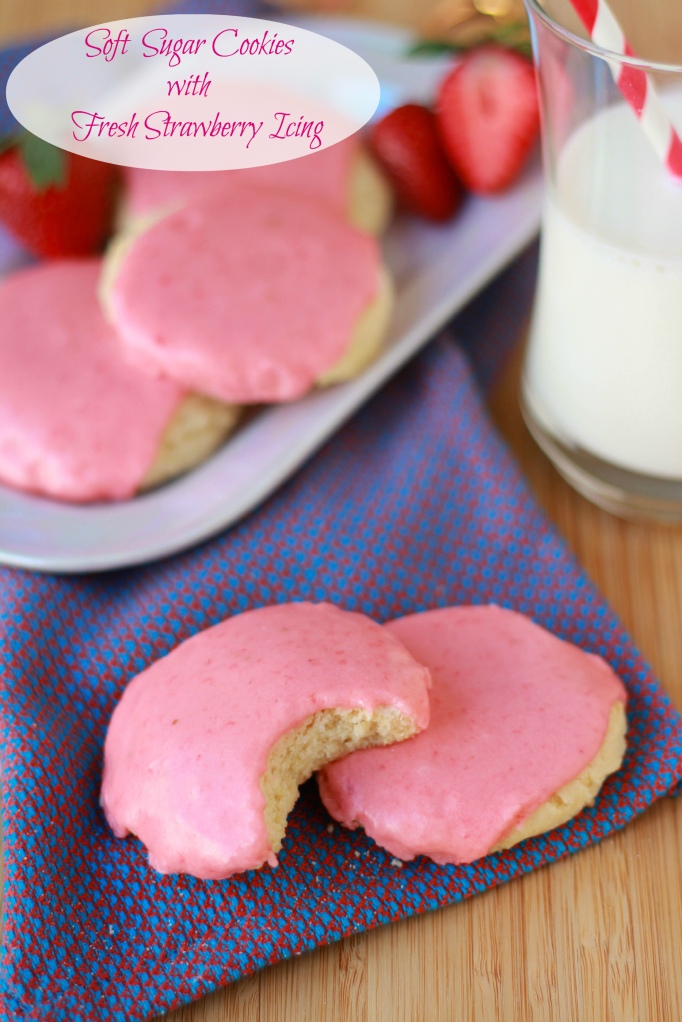
Soft Sugar Cookies with Fresh Strawberry Icing

strawbery cookies 1
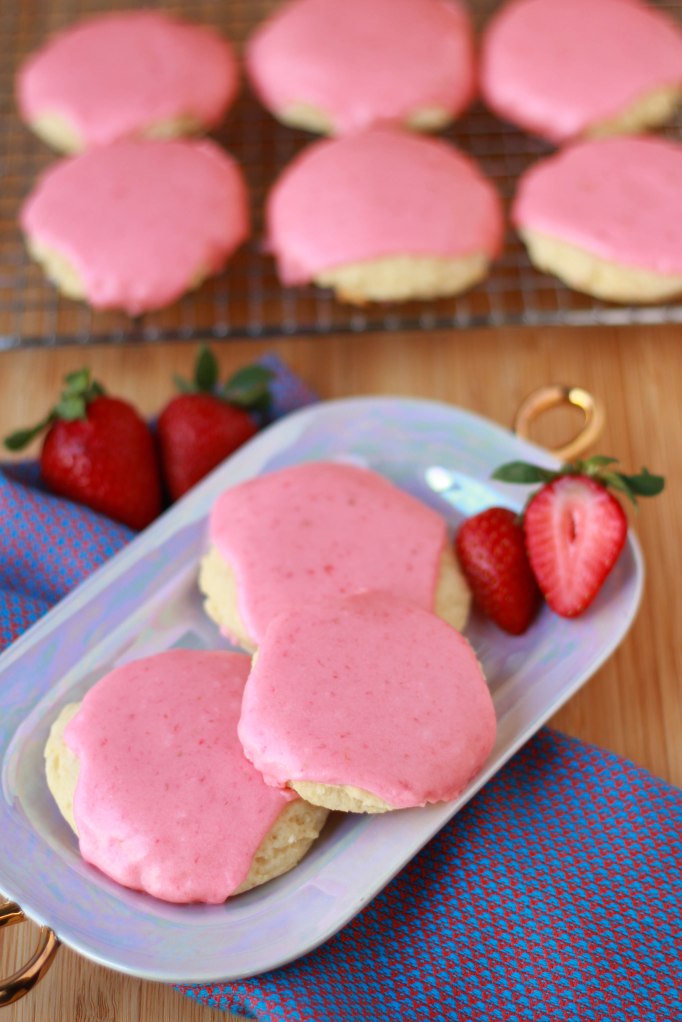
I am so excited to share these cookies with you. They are a fun twist on a typical frosted sugar cookie. What I love the most about these is that the beautiful, pink icing comes from fresh strawberries. No strawberry flavored cake mix, no strawberry gelatin, no food coloring, no scary ingredients, no artificial flavors. Just soft and tender sugar cookies covered in homemade strawberry icing. Yum! The sugar cookie recipe is simple and straight forward and the icing comes together quickly and gets spooned onto the top of each cookie. Along with the fresh strawberries, the icing also has lemon zest in it. The strawberries and lemon together give the icing a really bright and fresh flavor. The hardest part of this recipe is waiting for the icing to firm up once you’ve frosted the cookies. You can absolutely snack on these before the icing firms up –  just don’t stack them up or package them until it has set, otherwise you will have a mess on your hands. A delicious mess, but a mess nonetheless.
strawberry cookies final

Soft Sugar Cookies with Fresh Strawberry Icing
Makes about 2 dozen cookies

For the cookies:
1 stick butter, softened
1 cup granulated sugar
1 egg
1 egg white
1 heaping tablespoon sour cream
1 teaspoon pure vanilla extract
2 1/2 cups all-purpose flour
1 1/2 teaspoons baking powder
1/2 teaspoon salt

For the icing:
1 cup chopped strawberries
1/2 teaspoon lemon zest
3 1/2 cups powdered sugar, possibly a little more
2 tablespoons of butter, very soft but not melted
1/2 teaspoon pure vanilla extract

For the cookies:
Preheat oven to 350. Line two baking sheets with parchment paper or silicone liners.

Beat butter and sugar for several minutes, until light and fluffy. Add egg, egg white, sour cream and vanilla and beat until thoroughly combined. The mixture might look slightly curdled.

In a separate bowl, combine flour, baking powder and salt. With your mixer on low, add flour to the butter mixture, mixing until just combined.

Scoop the dough into 1 1/2 tablespoon balls and place on prepared cookie sheets. Use the palm of your hand to press down the balls of dough. These cookies will not spread much, so make sure you flatten them. Bake cookies for 7-9 minutes, until the tops are just set, but still appear soft. Cool on the baking sheet for 5 minutes, then remove to a rack to cool completely.

For the icing:
Put strawberries, lemon zest and 1/4 cup powdered sugar in the bowl of a food processor, fitted with a metal blade. Process until strawberries are completely smooth. Using a rubber spatula or wooden spoon, press the strawberry puree through a fine mesh sieve and into a large bowl. Discard the seeds.

Add butter, vanilla and remaining 3 1/4 cups powdered sugar to the strawberry puree. Whisk until smooth. If the icing seems too loose, add a little more powdered sugar. If it seems too dry, add a few drops of water. The final consistency should be a little thicker than honey. Depending on the moisture content of your strawberries you might need more or less powdered sugar. You can also refrigerate the icing for 15 minutes to help it firm up if necessary.

Place the cooled cookies on a rack set over foil or parchment paper (for easy clean up). Use a spoon to dollop the icing into the center of each cookie and slowly swirl it around, allowing it to flow outward toward the edges, and over some of the sides. Repeat with all the cookies. Let the cookies stand at room temperature for at least 2 hours, until the icing firms up.

Icing adapted from The All American Dessert Book

Banana Walnut Granola

banana granola
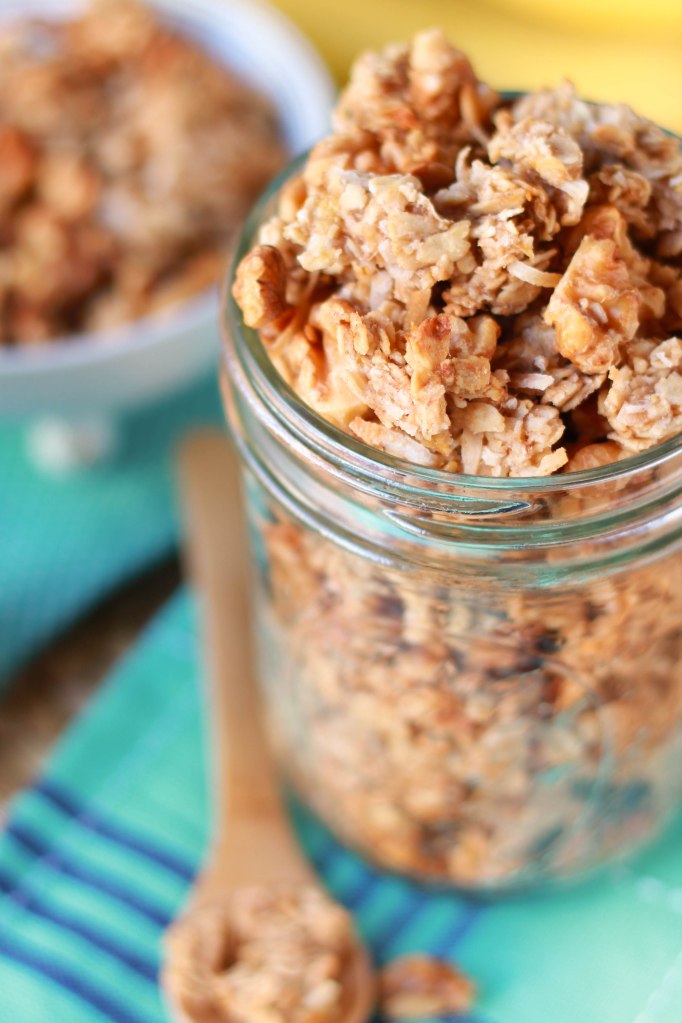
This recipe is like a hybrid between banana bread and granola. And what a tasty hybrid it is! When I first saw this recipe I assumed the “banana” came from dried banana chips, but, in fact, mashed bananas actually get mixed into the granola before it bakes. This gives the granola a wonderful sweet and fragrant banana flavor that is similar to banana bread. This recipe is super simple – I’m talking two bowls, a little mixing and throw it in the oven simple. We like this granola served with milk or vanilla yogurt and garnished with sliced bananas. It would also taste great with dried fruit or chocolate chips mixed in once it comes out of the oven.

banana granola 1

Banana Walnut Granola
makes about 6 cups

4 cups old fashioned rolled oats
1 cup raw walnuts, coarsely chopped
1/2 cup coconut flakes, sweetened or unsweetened (optional)
1 teaspoon ground cinnamon
3 tablespoons brown sugar
1/4 teaspoon salt
2 very ripe bananas, mashed
1/3 cup pure maple syrup or honey
1/4 cup melted coconut oil, melted butter or extra virgin olive oil

Preheat oven to 350. Line a baking sheet with parchment paper or a silicone liner and set aside.

In a large bowl combine oats, walnuts, coconut, cinnamon, brown sugar and salt. In a separate bowl, combine mashed bananas, maple syrup and oil/butter. Pour the wet ingredients into the dry ingredients and mix very well. Use your hands if you need to, to make sure all the oats are coated. Spread on prepared baking sheet and bake for 30-35 minutes, until golden brown. Stir the mixture two or three times during baking to ensure even browning. Cool completely and transfer to an airtight container.

Recipe adapted from Shutterbean

Warm and Cheesy Artichoke Jalapeno Dip (two ways)

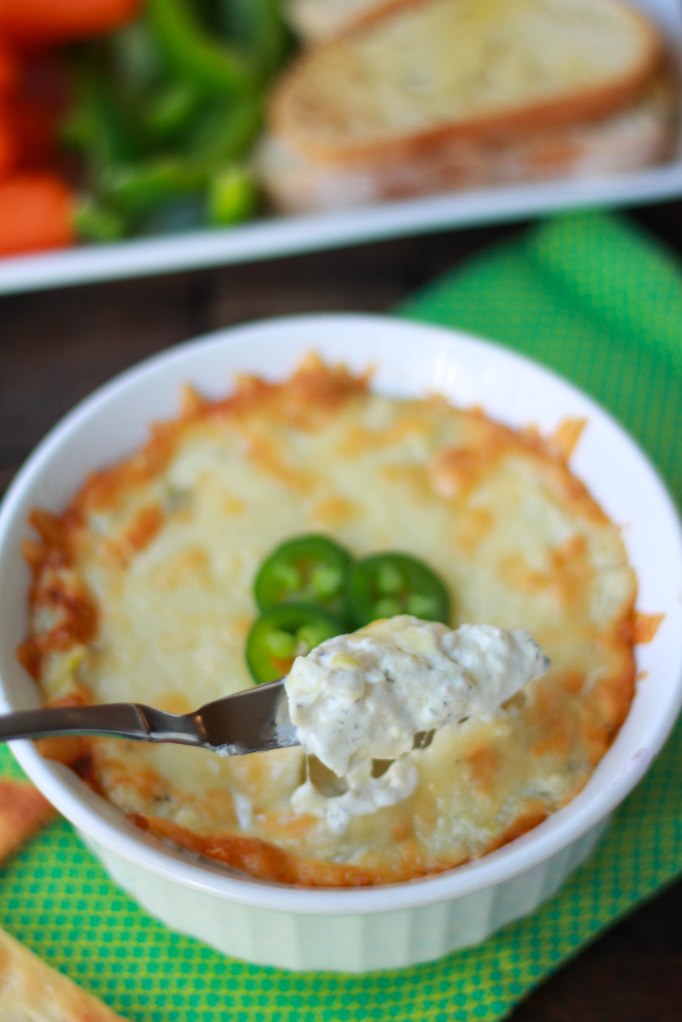
artichoke jalapeno dip 2
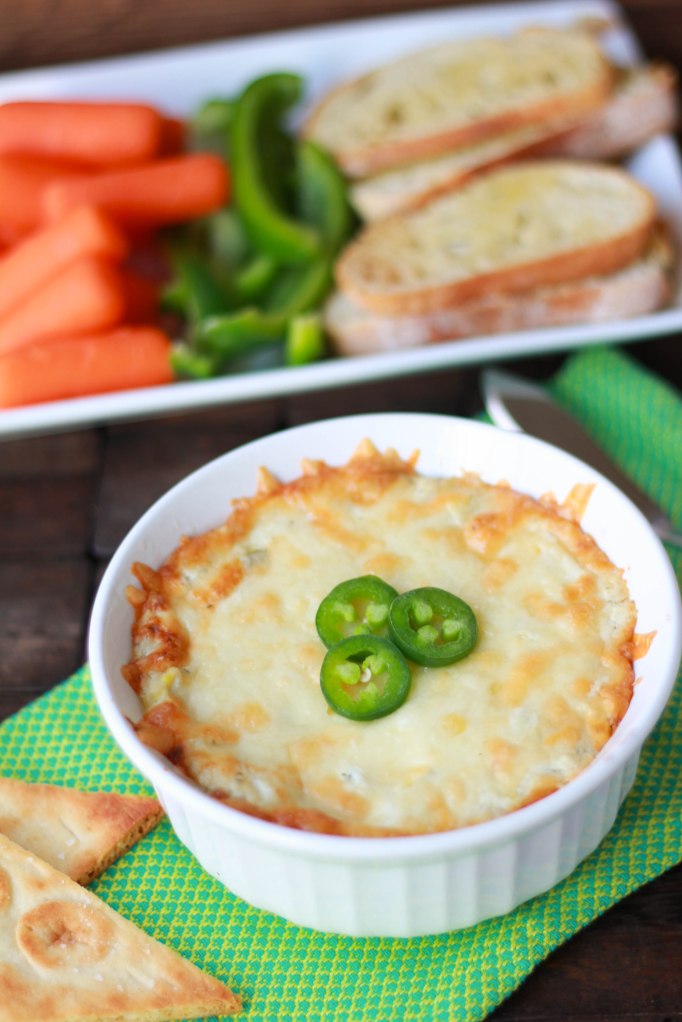
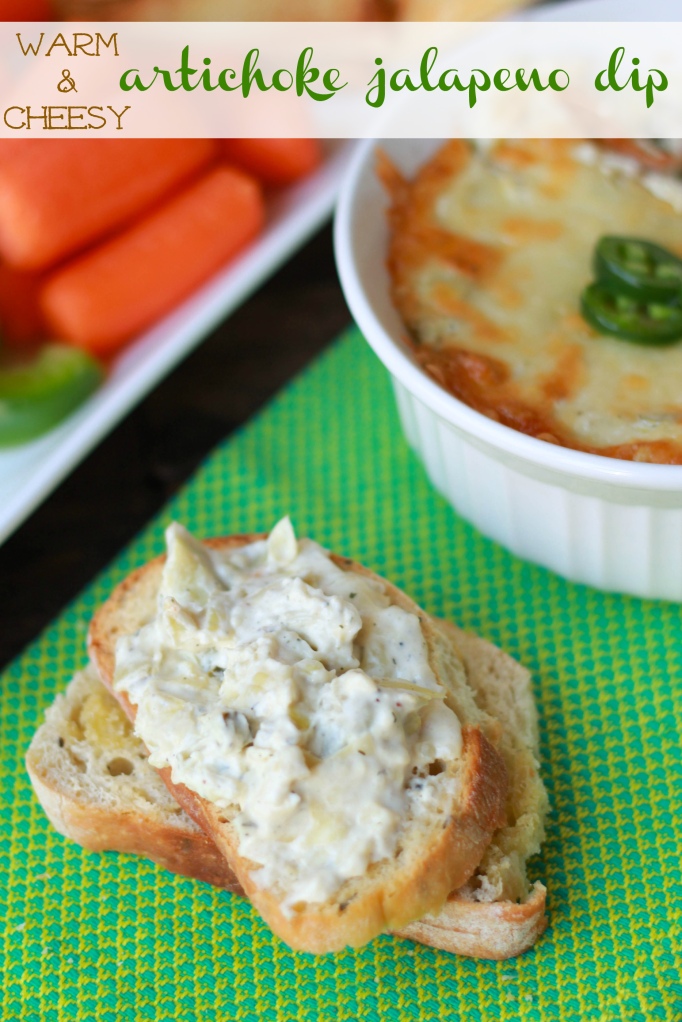
This dip is one of my weaknesses. I cannot be stopped once I start with this stuff – it’s that good. It’s the perfect combination of creamy, tangy, salty and spicy. It’s fantastic served with chips or toasted bread, but you could also offer veggies for dipping. I feel better about eating a bowl of bubbly cheese if I have some carrot sticks along with it. Just sayin’ 😉
This recipe is incredibly easy. You can make it in the oven or slow cooker. I suggest using the slow cooker if you’re planning on serving it at a party over a long period of time. This will help it stay warm and melty. The oven method is better if you’re serving it immediately. Either way, this is tasty stuff.
artichoke jalapeno dip

artichoke jalapeno dip 1
Warm and Cheesy Artichoke Jalapeno Dip
Makes about 3 cups

8 oz cream cheese, softened
3 tablespoons mayonnaise
1 1/2 cups grated Monterey Jack cheese, divided
14 oz can artichoke hearts, drained and chopped
2 to 4 tablespoons minced jalapenos* (fresh, canned or jarred)
1 garlic clove, finely minced
1/2 teaspoon dried dill
3/4 teaspoon salt
1/4 teaspoon ground pepper

Oven method: Preheat oven to 375. Mix all ingredients except 1/2 cup Monterey Jack cheese in a large bowl. Once thoroughly combined, place into oven safe casserole dish. Top with remaining 1/2 cup Monterey Jack cheese. Bake for about 15-20 minutes, until warmed throughout and bubbly. Turn on the broiler and broil for an additional minute or two to brown the top. Serve immediately with chips, toasted bread or crudites.

Slow cooker method: Place all ingredients in a slow cooker and warm over medium/high heat, stirring occasionally. Once all the ingredients are warmed and melted, reduce the slow cooker to “low” or “keep warm.” Serve straight from the slow cooker with chips, toasted bread or crudites.

*A note about jalapenos: if you are sensitive to heat, start with the smaller amount and work up from there. The heat in a jalapeno is in the seeds and ribs, so I suggest removing most or all of them if you don’t want it too spicy.

Other “game day” foods:
BBQ Pulled Pork Potato Skins
potato skins

Soft Pretzel Bites with White Cheddar Dipping Sauce
Soft pretzels 3

Beef and Sweet Potato Chili
chili 1

Slow Cooker French Dip Sandwiches
french dip 2